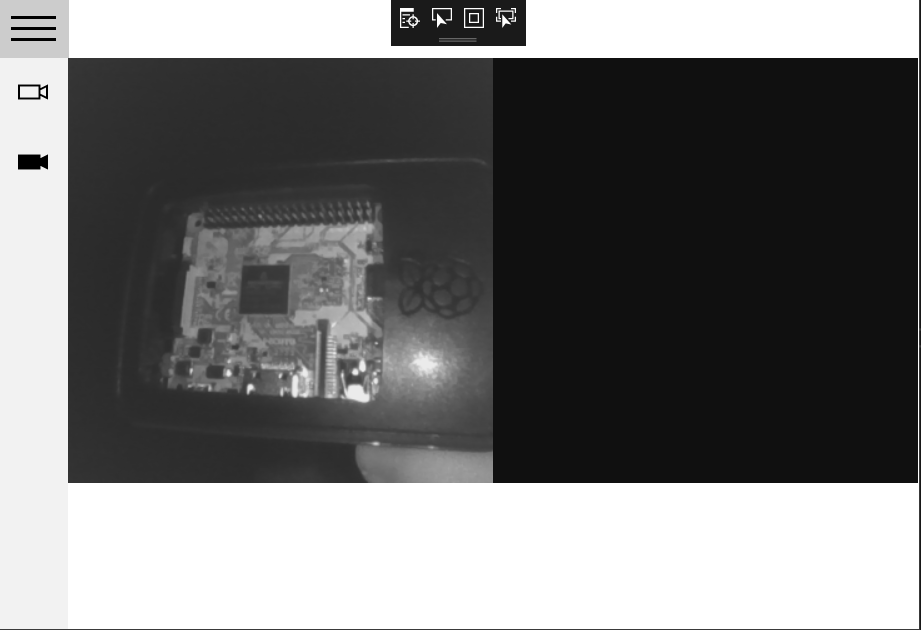
So… it has been more than a year since I uploaded my last blog, but here is the continuation of my last post as I promised.
This time we will use the Windows SDK in order to use the Infrared and Color streams from the camera.
Just a little warning, this camera’s drivers are only compatible with already deprecated Windows 10 clases and methods, and may not even work in the future. I would like to think that if that is the case, Computer Mouse will release new drivers that make use of the new clases and methods.
The code I’ll be using I also uploaded to GitHub for everyone to see and have fun with it, and I will update it if and when there are new drivers for the new clases.
えっと、なんだ・・・前のブログポストから半年以上もたちましたが、約束した通り前の続きの話そうか。
今回はカメラの赤外線とカラーストリームを使うために、Windows SDKを使用する。
報告:このカメラのドライバーで使えるクラスやメソッドなどは現代のWindows 10では廃止予定になっており、後で使えなくなるかもしれません。もしそういうことになったらコンピューターマウスから新しいクラスとメソッドが使える新ドライバがリリースされると思いたい。
使うコードはすでに GitHub にアップロードしており、もし新ドライバがリリースされたら、そこのコードも更新する予定だ。

Most webcams are “USB video device class” or UVC cameras, which is a standard specification for USB cameras and basically works with most standard webcam software and libraries.
The CM01 is a UVC camera, but it is only recognized as UVC for the color stream, and in order to access the infrared stream, we need to make use of Windows.Devices.Perception which have clases and methods for accessing color, infrared and depth video streams.
We could use a UVC library to access the color video stream, but we will be using Windows.Devices.Perception for both infrared and color video streams.
殆どのウェブカメラは「USB video device class」略してUVCカメラであり、この基準を使うカメラはすでに存在するウェブカメラ用のソフトとライブラリの殆どが使える。
CM01はこのUVCカメラになりますが、UVC使えばカラーストリームしか取得できないから、今回赤外線ストリーム取得するために Windows.Device.Perception の中にあるクラス使うことでカラー、赤外線、深度ビデオストリームにアクセスできる。
カラーストリーム取得するなら、UVCライブラリが使えるが、今回はカラーも赤外線ビデオストリームも両方 Windows.Devices.Perception で取得する。
We start by requesting access to what is called the “Frame Source” which are the sensors, by calling
まず、次のこどを使って「フレームソース」すなわちセンサーにアクセスを要求する
赤外線センサーの場合は:
PerceptionInfraredFrameSource.RequestAccessAsync();
for the infrared sensors and
カラーセンサーの場合は:
PerceptionColorFrameSource.RequestAccessAsync();
for the color sensors.
We can confirm that we got access to the sensors by making sure that the result of these request are equal to PerceptionFrameSourceAccessStatus.Allowed .
ちゃんとアクセス出来たかどうかを確認するには、この要求の結果は PerceptionFrameSourceAccessStatus.Allowed と比較すればいい。
After this, we need to find and select the correct source for each type of sensor.
If you only have the CM01 Camera connected, it should be easy, since there should be just one sensor for each type, but if you have some other color or infrared camera connected you need to specifically search for the sensor you want, but I’m just going to show you how to get the sensor data assuming you have just one camera connected.
このあと、各センサータイプの適切なソース検索してから選択しなければいけない。
もし、CM01以外に他のウェブカメラが接続されなければ、各センサータイプは一つしかないはずなのでこれは簡単だが、もし別のカラーまたは赤外線カメラが接続されたら、CM01のセンサーを探さなければいかなくなるので、めんどくさくなる。今回はCM01以外のカメラがないということにして続く。
var irSources = await PerceptionInfraredFrameSource.FindAllAsync();

var irSource = irSources.First();
We get all sources with PerceptionInfraredFrameSource.FindAllAsync() and then select the first (and only in this case) source by using irSources.First().
PerceptionInfraredFrameSource.FindAllAsync() を使うことですべてのソースを取得して、irSources.First()を使えば最初(そして今回は唯一)のソースを手に入れる。
The color source is the same, but you should use PerceptionColorFrameSource instead of PerceptionInfraredFrameSource.
カラーソースの場合は同じだが、PerceptionInfraredFrameSourceの代わりにPerceptionColorFrameSourceを使う。
In order to read the frames, we need a PerceptionInfraredFrameReader (or PerceptionColorFrameReader for color frames), which in this case will be this.irFrameReader, so we do:
フレーム読み込めるために、PerceptionInfraredFrameReader(カラーフレームならPerceptionColorFrameReader)が必要になって、今回はthis.irFrameReaderになるます。次は:
this.irFrameReader = irSource.OpenReader();

this.irFrameReader.FrameArrived += _irFrameArrived;
What this does is first, open the video stream using OpenReader() and then we send each new frame as an event (FrameArrived) to the method _irFrameArrived.
これはまず、OpenReader()を呼んでビデオストリームを開いて、各新フレームをイベント(FrameArrived)として_irFrameArrivedというメソッドに送る。
This method looks like this:
このメソッドは次の通り:
void _irFrameArrived(PerceptionInfraredFrameReader sender, PerceptionInfraredFrameArrivedEventArgs args)
The sender is just the reader which we won’t be using, and args, which is the new frame “event arguments”, which means this is just an event which tells you that a new frame has arrived, but it’s not the actual frame, in order to get the frame we do
senderは単なる前のフレームリーダーになるのだが、今回は使わない、そしてargsは新フレームの「イベント引数」となる。フレームそのものじゃなくて、「イベント引数」なので、フレーム手に入れるには次のコードを使わなければいけない:
using (var frame = args.TryOpenFrame())

{

...
This tries to open the frame, and if we are successful we should get a PerceptionInfraredFrame, but since we are not sure, we need to first test that frame is not null and the proceed.
After making sure that frame is not null, we just get the frame by calling
このコードはフレームを開こうとするメソッドで、成功すればPerceptionInfraredFrame取得するが、もしかしたらnullかもしれないので、まずはnullかどうかを確認してから続く。
確認したら次は次のコールすれば生のフレームが取得できる:
frame.VideoFrame.SoftwareBitmap;
This frame is in the “Grey16” format, but since it is a “SoftwareBitmap” we can convert it to any video type we want; in my example the canvas I’m using doesn’t support “Grey16” I transform it to BGRA8 by doing:
このフレームのフォーマットは「Grey16」になりますが、「SoftwareBitmap」なので別のフォーマットに変換でる。私のコードでは使ってるCanvasがそのまま「Grey16」が使えないので、まずは「BGRA8」に変換する:
var frameBitmap = SoftwareBitmap.Convert(

videoFrame, BitmapPixelFormat.Bgra8,

BitmapAlphaMode.Ignore);
Now comes the interesting part, Windows Hello requires that the camera returns “illuminated” and “non-illuminated” frames, which means frames with the IR illumination leds ON, and frames with the IR illumination leds OFF.
The funny thing is the way it does it this camera, because the stream you get has interlaced each frame the illuminated and non-illuminated frames, and there is no way to control this, which means that each illuminated frame is followed by a non-illuminated frame.
そして次は一番面白いところになる。Windows Helloでは赤外線センサーから「照明フレーム」と「非照明フレーム」が戻されるという条件があります、これは単なるカメラの赤外線LEDがONかOFFとの両方の状態からフレームが必要ということ。
だが、面白いことに、このカメラでは赤外線センサーをONにすれば、2フレームのうち一つは「照明フレーム」になって、もう一つは「非照明フレーム」となる。そしてこういう動作制御できる方法は全くないという。
If you just stream the video with both illuminated and non-illuminated frames streaming at the same time, you will get a lot of flickering in the image, so to avoid this I divide each type of frame by doing this simple thing:
もしそのまま赤外線のビデオストリームを再生したら、ちらつきがやばくてあまり何も見えなくなるので、各フレームを別タイプに分ければいいという簡単なことしたら「照明フレーム」と「非照明フレーム」の両方が別々で手に入れます:
if (this.ilFrame)

{

this.ilFrameBitmap = frameBitmap;

}

else

{

this.nilFrameBitmap = frameBitmap;

}

videoFrame.Dispose();

this.ilFrame = !this.ilFrame;
I’m using ilFrame as to refer to illuminated frames, and nilFrame as non-illuminated frames, but the truth is, as far as I know there is no way to know which one is it. So some time the first frame may be illuminated, and some times it may be non-illuminated.
Now, the videoFrame.Dispose() at the end is necessary to not get a memory overflow and errors while looking at the camera.
コードではilFrameは「照明フレーム」でnilFrameは「非照明フレーム」となってますが、実際に動いているときにどっちはどっちなのかを判明する方法はない。時に最初のフレームは「照明フレーム」で時に「非照明フレーム」になる。
後、videoFrame.Dispose()がないとメモリーオーバーフローになるので必要となる。
As a last point, we can pause the video stream at any point by making irFrameReader.IsPaused true.
最後に、ビデオストリームを一時停止するにはirFrameReader.IsPausedをtrueにすればいい。
And that’s about it.
The color frame is the same, but you don’t need to worry about the interlaced frames.
これで終わり。
カラーフレームの場合は同じなんですが、フレームを分けるという作業やらなくてもいいです。
